
Step-by-step guide
How to use Backgrounds Remover
Four steps, all in your browser tab. Your image is never uploaded, and nothing needs installing.
-
1
Add your image
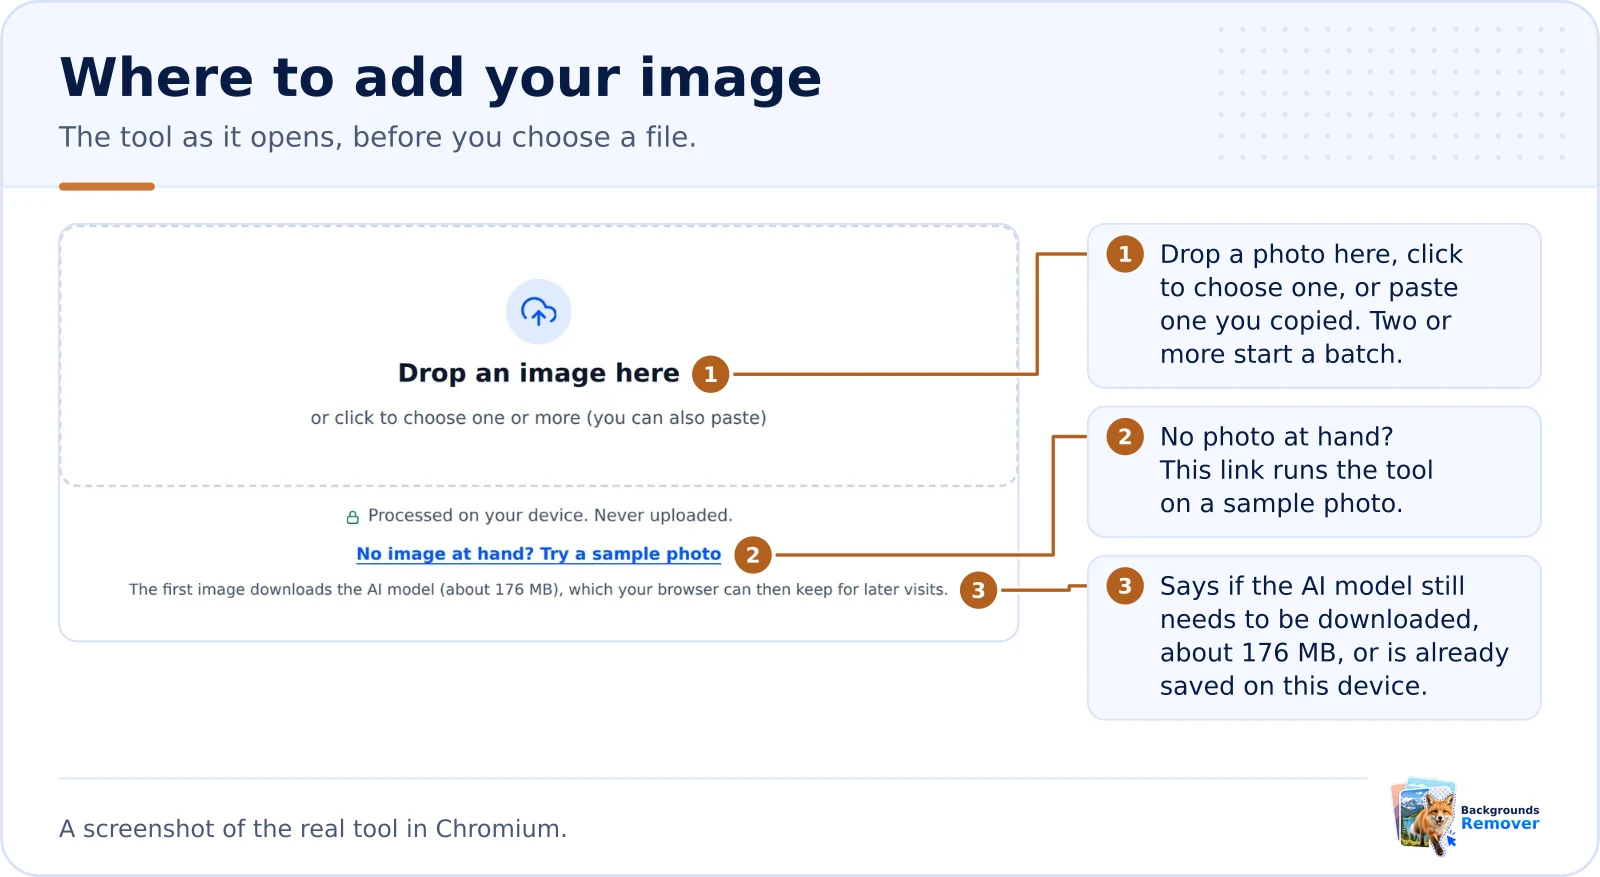
Drop a photo onto the box, click it to choose a file, or paste an image you copied. JPEG, PNG, and WebP work, and AVIF, GIF, and BMP usually do too. No photo at hand? Use "Try a sample photo" under the box. Choose or drop two or more images at once to process up to 20 as a batch.
-
2
Let the AI model run
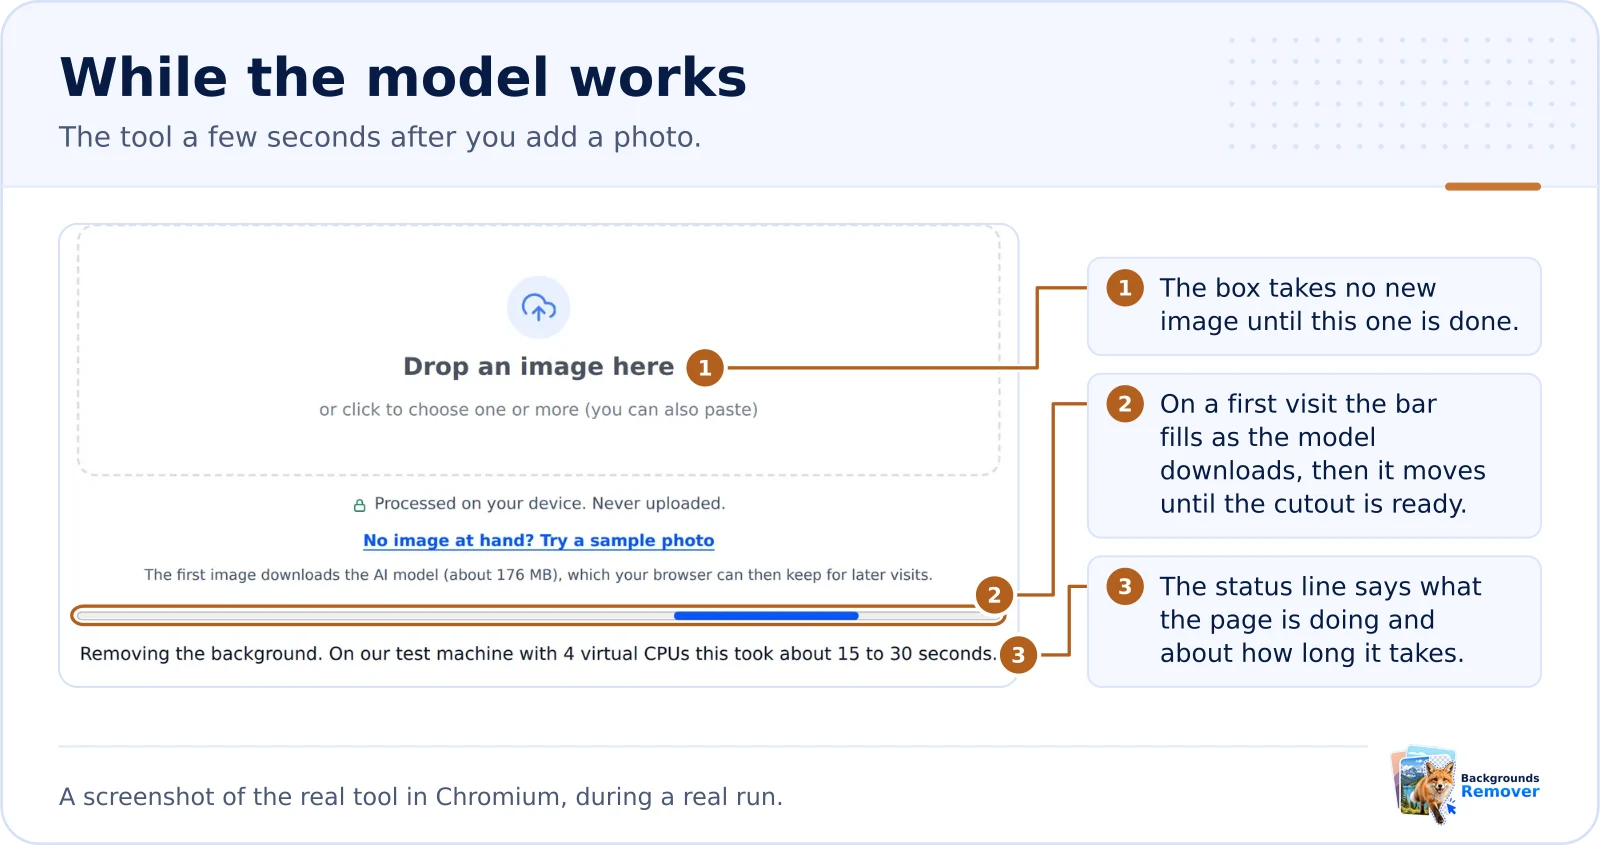
The first image downloads the AI model once (about 176 MB, plus an engine of 11 to 25 MB) and keeps it in your browser, so later visits skip the download while the browser keeps it. Then the model finds the subject. The status line gives about 15 to 30 seconds, from the engine's benchmark on a cloud server with 4 virtual CPUs in Chrome: one image took about 14 to 16 seconds with four threads and 30 seconds with the single-threaded CPU build. Your time depends on your processor. The page uses your graphics card through WebGPU when the browser makes one available, and switches to the processor on its own if the graphics card cannot start the model.
-
3
Choose a background
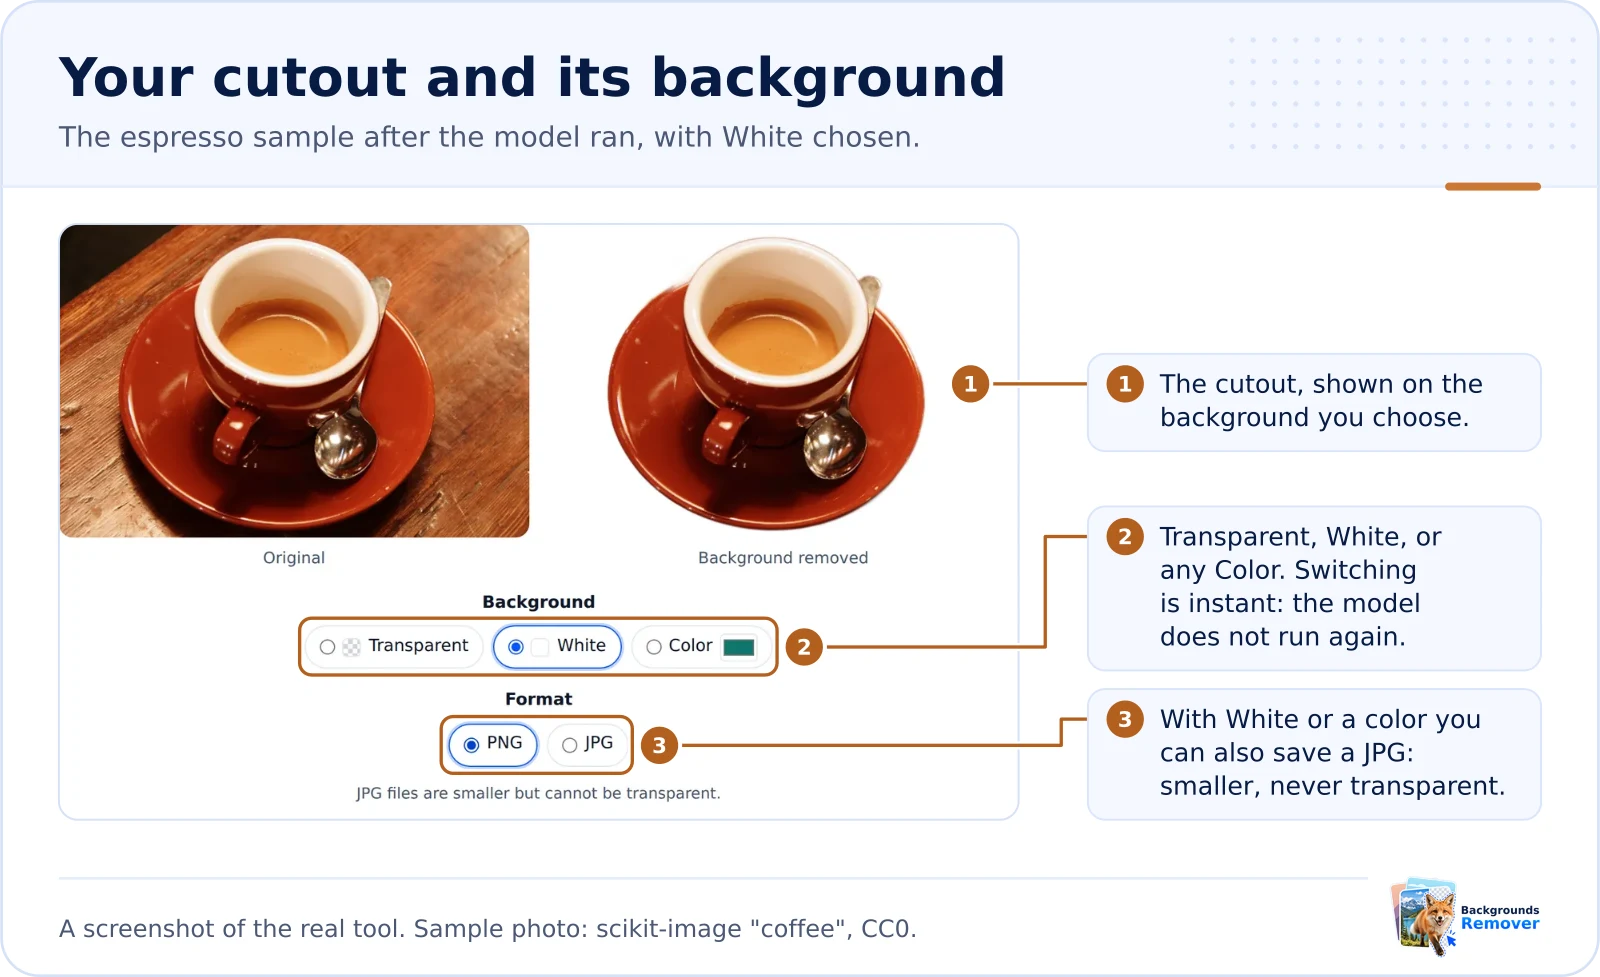
Keep it Transparent, or place the subject on White or on any Color you pick. Switching is instant because the model does not run again. For White or a color you can also save a JPG, which is smaller but can never be transparent.
-
4
Pick a size and download
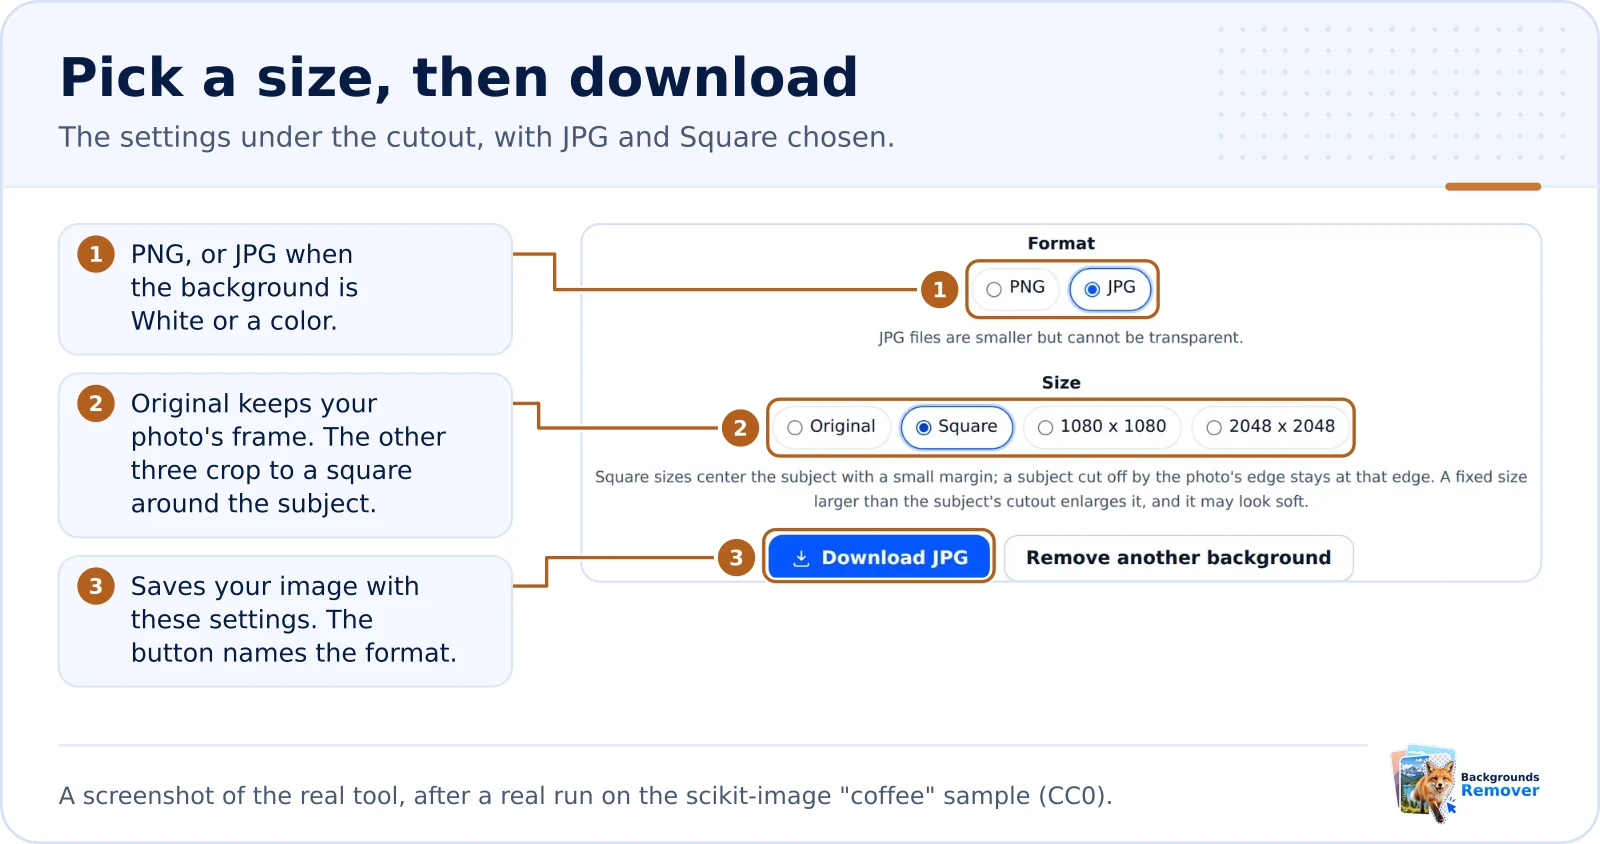
Original keeps your photo's frame. The other three crop to the subject and place it in a square with a small margin: Square keeps the subject at its own resolution (at most 4000 x 4000), while 1080 x 1080 and 2048 x 2048 always give that exact size, so a smaller subject is enlarged and can look soft. A subject the photo cuts off, such as a headshot at the shoulders, stays against that edge. Then press Download PNG, or Download JPG if you chose it. "Remove another background" starts over with a new image.
The timings in step 2 come from the engine measurements on how it works, which also explains what runs where.
Several images at once
Choose or drop two or more images together to start a batch (in the file picker, Shift-click or Ctrl-click to select several, or Command-click on a Mac). The page processes them one after another on your device, the same way it handles one image, and never uploads them. Selling online? The product photo guide shows a whole catalog on white in one batch, with the settings to pick.
- A row for each image. Every row starts at "Waiting", changes to "Working...", and ends with "Done in" and the time, followed by a Download link, or with the reason that image failed. The status line names the image in progress ("Image 3 of 12:"), the bar shows how much of the batch is done, and the preview shows the latest finished image.
- A failed image does not stop the others. A file that cannot be opened as an image, or an unexpected error, marks its row and the page moves on. If your browser runs out of memory or the engine cannot load, the batch stops there: finished images stay, and the rest read "Not processed".
- On a phone or tablet, save each image with its row's Download link as it finishes. With little free memory the batch may stop partway, and some phones reload the tab instead, which clears the batch.
- Cancel stops the batch right away. Finished images stay ready to download, and the others read "Cancelled". Once the AI model has downloaded, the next batch in the same visit does not download it again, and neither does a later visit while your browser keeps it. If you cancel during the first download, the next batch downloads only the rest of it.
- One setting for all. The Background, Format, and Size you pick apply to every image. You can change them after the batch ends; they are applied when you download, without running the model again. To give one image a different look, change the settings and use that image's own Download link.
- Download all (ZIP) saves every finished image in one ZIP file named for your settings, such as
images-white-background-2048x2048.zip. Each file inside keeps its own name with the settings added, such asmug-white-background-2048x2048.jpg; when two images share a name, the second one becomesmug-white-background-2048x2048-2.jpg. - Up to 20 images per batch. If you choose more, the first 20 are processed and the page says how many it skipped ("Only the first 20 images are processed. Skipped: 3."). Start another batch for the rest.
- Time adds up per image. Each image takes about as long as it would on its own. In the engine's benchmark on a cloud server with 4 virtual CPUs, one image took about 14 to 16 seconds, so a batch of 20 takes about 5 minutes on a similar processor (an illustrative estimate, 20 x 14 to 16 seconds). The one-time model download comes on top on a first visit. Your time depends on your processor.

If something goes wrong
- "The background removal engine is not available on this server right now." The page could not load its engine files. Check your connection and try again later.
- "This file could not be opened as an image." Your browser cannot decode it. Save it as JPEG, PNG, or WebP and try again.
- "Your browser ran out of memory." In our measurement in desktop Chromium on a computer with 4 virtual CPUs, the browser tab used about 1.2 GB of memory for a typical photo and up to about 1.6 GB for a 16-megapixel photo, and processing many large photos in one visit can take it to about 2 GB. Close other tabs, or try a smaller image. Phones and tablets with little free memory can hit this.
- "The graphics card could not run the model, so the CPU is being used instead." Nothing to do: the page restarts on your processor and carries on with the same image. The message may only show for a moment.
- "Something went wrong while removing the background." The engine's technical detail appears on a separate line below the buttons. The page restarts its engine after this error, so try the same image again. If it keeps happening, try another browser.
- Images above 16 megapixels are scaled down first, and the page tells you the size it used.
Getting a cleaner cutout
The model keeps the most prominent subject, and fine hair, glass, and busy scenes can come out imperfect. A plain background and even light help most; the guide on removing a background without uploading has more tips, and fixing halos and rough edges shows how to touch up an edge in a free editor.
Ready to try it?
Open the tool and use the sample photo under the drop zone to walk through all four steps before you try your own image.
Remove a backgroundTry it on your own photo
Runs in your browser. Your image never leaves your device.